

Don't forget to add your finished pillowcase numbers to the Million Pillowcase numbers. You can also find a pattern there.
******************
Tuesday Tutorial Tips
******************

Directions and videos to make pillowcases are all over the web.
On average we used fabric about 45 inches wide.
I really didn't worry about the widths, because I trimmed later.
I started with 3 pieces of fabric with width of fabric (WOF) around 45,
and pieces measuring 26, 12 and 2 inches.
This method to make a pillowcase is usually known as the "Burrito Method."
All seams are hidden.

The 2 inch piece was folded in half lengthwise and pinned to right side of long edge of 26" piece.

Then the 12 inch wide piece was pinned on top of 2 inch strip.


Roll the large piece as shown and fold the bottom of the 12 inch piece up and over
the whole roll and pin all layers together.
Consequently, the following layers of fabric will be stitched in one seam:
the bottom is the 12 inch piece,
the 2 layers of the 2 inch piece,
1 layer of the 26 inch piece,
the top layer is the other edge of 12 inch piece.

After all the edges are stitched with one seam, it does remind one of a burrito.
Pull the large piece causing the whole unit to be turned inside out.

Press

Enclose the side and bottom in a French seam by placing wrong sides together first
and stitching quarter inch seam. See Tip Below

Then stitch right sides together with a 1/2 inch seam enclosing the quarter inch seam.
*******
Here are the Tips and Tricks I used:
#1

Most machines these days come with this generic foot.
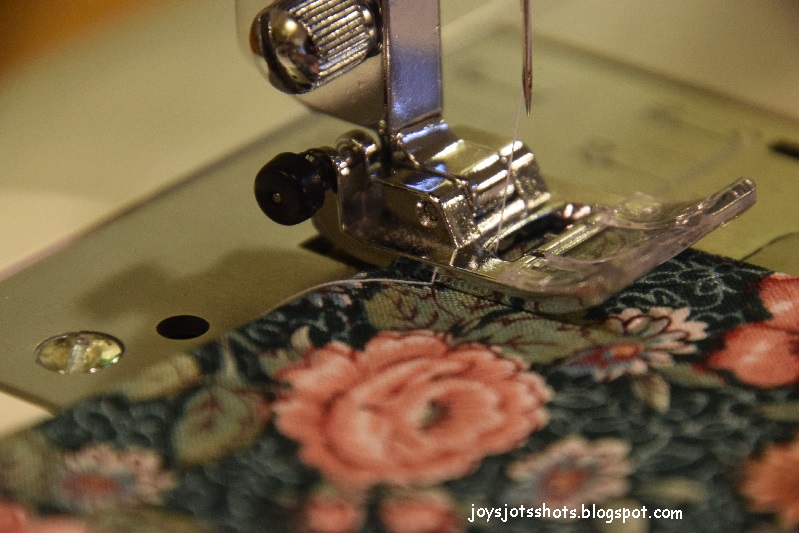
That black button has a use.

When stitching several layers of fabric like when stitching over this band and flange,
the machine can skip stitches.
To help prevent skipped stitches, push the black button in as stitching is continued.
You can also lift the pressure foot, and push it in to lock it in.

This holds the foot level as you stitch over the hump.
It does the same job as a "Hump Jumper."
#2

As you take the time to turn the pillowcase inside out,
starting at the top, pull the seam gently apart as you travel down the seam to the corner.
Then turn the corner which is my next tip.
Depending on the "hand" of the fabric, you then may not need to press the seam.
#3
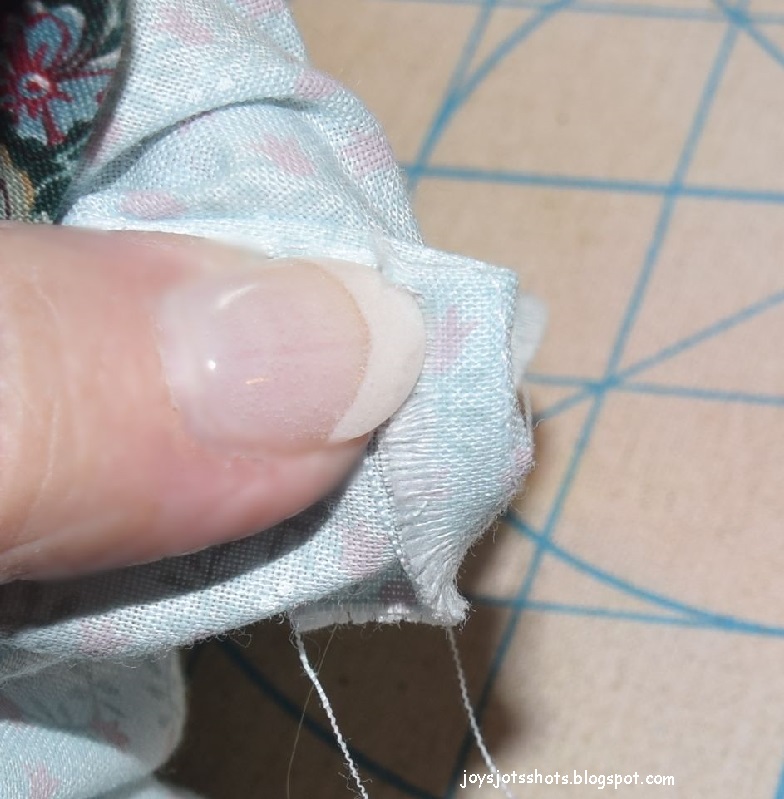
When you reach the corner,
leave your thumb on the outside and the pointer finger on the inside.
Fold one seam over, then the other along the stitch line.
This makes a right corner as shown.

so your pointer finger is now out and thumb is inside.
Only a few times you might need to take a pin and pull out the corner fully,
but usually not.
#4

Always stitch toward the fold.
After all, it will always turn out even.
#5

To make sure edges stay evenly together as in the top of the pillowcase,
set & start the needle about 5 stitches in the seam
and backstitch to the edge.
Every time I start on the edge, one layer usually shifts forward and the edges are not even.
******************
You'll find this post at several Linky Parties. Please check them out for some great ideas.
Thanks to
GIMP for cropping & other digital effects
PicMonkey creating collages used on this page
Photoscape for downsizing & watermarking photo
No comments:
Post a Comment
Have a JOYful day!
Leave a comment or an email if you like.
I will enJOY either.
Please LEAVE YOUR EMAIL ADDRESS if you need a reply.